
- Ira Poblete
- Jul 11
- 7 min read


A great recording studio is not just about having the best equipment - from high-end monitors, preamps, microphones, to expensive plugins. The room itself plays a major role in what you hear, how accurately you make decisions, and how well your work translates outside the studio.
Poor recording studio design can make a good mix sound wrong, cause recordings to feel unclear, and lead to endless revisions because what sounds balanced in the room falls apart everywhere else. More often than not, the issue is not within the type of gear you have or your ears. Simply, it is the space.
Whether you are building a professional studio, upgrading a production room, or improving a home recording setup, avoiding these common design mistakes can help you create a room that sounds more accurate, controlled, and reliable which translate better.
1. Ignoring Room Geometry
One of the biggest recording studio design mistakes is starting with a room that has problematic proportions or layout issues without accounting for how sound will behave inside it.
Small square rooms, perfectly parallel walls, low ceilings, and awkward alcoves can create serious acoustic problems. These shapes often cause standing waves, flutter echoes, and uneven bass response. As a result, some frequencies may sound louder than they really are, while others may disappear completely.
That is why two mixes can sound completely different even when played through the same speakers. The room plays heavy influence on what you hear.
How to fix it
Start by understanding the shape and dimensions of the room before adding equipment or treatment. Ideally, a studio should avoid perfectly square dimensions and should be planned with symmetry around the listening position.
For control rooms, left-right symmetry is especially important. If one speaker is near a wall and the other opens into a doorway or corner, your stereo image will be uneven. You may start panning, EQing, or balancing based on false information.
When possible, choose a room with balanced proportions, a centered listening position, and enough depth to manage reflections. If the room already has issues, acoustic treatment, speaker placement, and layout planning can help reduce the damage.
2. Placing Speakers in the Wrong Position
Speaker placement is one of the most overlooked parts of recording studio design. Many people place their monitors where they look good, where they fit on a desk, or where the room allows space. Unfortunately, even high-end monitors can perform poorly when placed incorrectly.
Common speaker placement mistakes include putting monitors too close to corners, placing them directly against a wall without planning for boundary effects, setting them at the wrong height, or creating an uneven listening triangle.
When speakers are placed poorly, the room exaggerates or cancels certain frequencies. This makes it difficult to judge low-end, vocal presence, stereo width, and overall balance.
How to fix it
Your speakers and listening position should form an equilateral triangle. This means the distance between the two speakers should roughly match the distance from each speaker to your listening position.
The tweeters should be at ear level, and the speakers should be angled toward the listening position. Avoid placing one speaker closer to a side wall than the other, because this can pull the stereo image to one side.
It is also important to test the distance between the speakers and the front wall. In some rooms, moving the monitors even a few inches can make a noticeable difference in low-frequency accuracy.
Speaker placement should never be treated as a final styling decision. It is a core performance decision.
3. Leaving Early Reflections Untreated
Early reflections are the first sound reflections that bounce off nearby surfaces and reach your ears shortly after the direct sound from the speakers. These reflections usually come from side walls, the ceiling, the desk, and sometimes the rear wall.
When left untreated, early reflections blur the stereo image and make it harder to hear detail. You may struggle to place vocals, judge reverbs, or make precise EQ decisions. The room starts adding information that is not actually in the recording.
This is one reason a mix can feel clear in the studio but cloudy or unbalanced in headphones, cars, or other playback systems.
How to fix it
Treat the first reflection points. These are the areas on the side walls and ceiling where sound from the speakers first bounces before reaching your ears.
A common way to find side-wall reflection points is the mirror method: sit in the listening position while someone moves a mirror along the side wall. Wherever you can see the speaker in the mirror, that area is a reflection point.
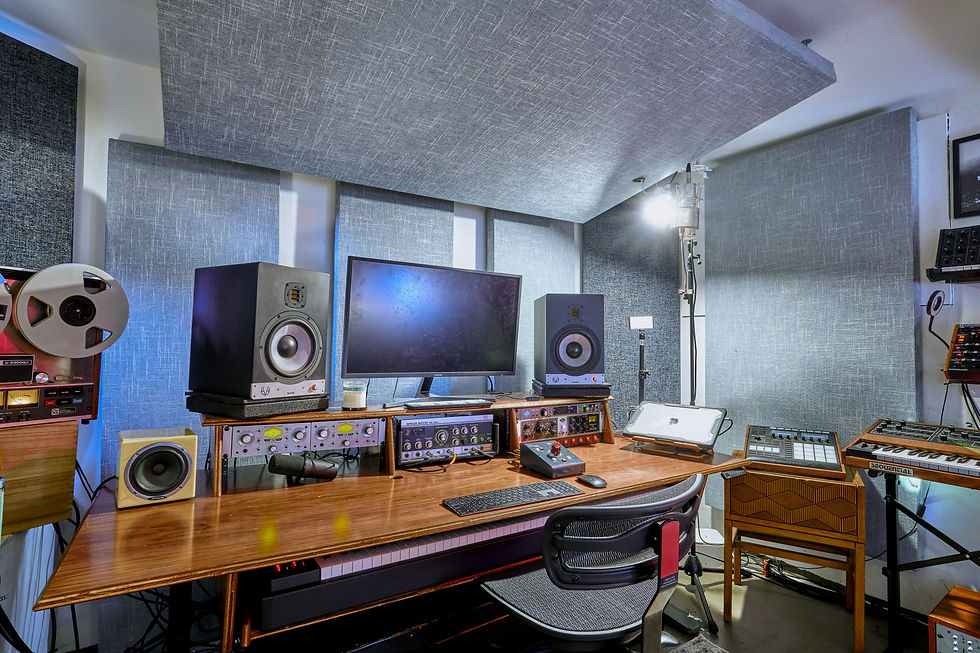
Acoustic panels placed at these points help absorb unwanted reflections and improve clarity. A ceiling cloud above the listening position can also reduce vertical reflections, especially in rooms with lower ceilings.
The goal is not to make the room completely dead. The goal is to control reflections so you can hear the speakers and the recording more accurately.
4. Treating Only the Walls and Ignoring the Bass
Many studios add foam or thin wall panels and assume the room is treated. While this may reduce some high-frequency reflections, it does very little to solve low-frequency problems.
Bass is usually the hardest part of a room to control. Low frequencies build up in corners, along boundaries, and in specific areas of the room. This can make the kick, bass guitar, 808s, or low-end energy sound misleading.
If your room is lying to you about bass, your mixes will not translate. You may cut too much low-end because the room sounds boomy, or add too much because the listening position has a bass null.
How to fix it
Bass trapping should be part of the recording studio design plan from the beginning. Corners are typically key areas because low-frequency energy tends to collect there.
Thicker broadband absorbers, corner traps, and properly designed low-frequency treatment can help smooth out the bass response. The exact approach depends on the size, shape, and construction of the room.
It is also important to remember that foam is not a complete acoustic solution. Foam can help with certain high-frequency issues, but it will not solve deep bass buildup or major room mode problems.
For accurate monitoring, bass treatment is more foundational than it is optional.
5. Confusing Acoustic Treatment With Sound Isolation
Acoustic treatment and sound isolation are often mistaken for the same thing, but they solve different problems.
Acoustic treatment improves the sound inside the room. It controls reflections, decay time, flutter echo, and frequency buildup.
Sound isolation controls how much sound enters or leaves the room. It helps prevent outside noise from getting into recordings and keeps studio sound from disturbing nearby spaces.
A room can be acoustically treated but still leak sound. It can also be isolated but still sound terrible inside.
How to fix it
Decide what problem you are solving before choosing materials. If the room sounds harsh, boomy, or unclear, you need acoustic treatment. If outside noise, traffic, neighbors, HVAC, or sound leakage is the issue, you need isolation.
Proper isolation usually involves construction details such as mass, airtight sealing, decoupling, specialized doors, window design, and mechanical noise control. Hanging panels on the wall will not soundproof a room.
For recording studios, isolation is especially important if you are tracking vocals, drums, amps, voiceovers, or acoustic instruments. Even low-level background noise can affect recording quality.
6. Designing Around Looks Instead of Listening Accuracy
A studio should look inspiring, but visual design should not come before acoustic performance. One common mistake is choosing furniture, wall finishes, panels, and layouts based only on aesthetics.
Large reflective desks, glass surfaces, bare floors, oversized screens, and untreated decorative walls can all affect the sound. A beautiful room can still be a difficult room to work in if the design choices create acoustic problems.
How to fix it
Treat aesthetics and acoustics as part of the same design process. The best recording studio design balances performance, workflow, and visual identity.
Choose furniture that supports speaker placement and reduces problematic reflections. Use acoustic panels, diffusers, bass traps, and finishes that integrate with the look of the room instead of feeling like afterthoughts.
A professional studio should feel good to work in, but it should also help you make better decisions.
7. Forgetting Workflow and Ergonomics
Sound is the priority, but workflow matters too. A poorly planned studio can slow down sessions, create clutter, and make the room harder to use.
Common workflow mistakes include placing gear too far from the listening position, blocking access to instruments or patching, using an oversized desk, or designing a room that does not match the actual work being done.
A mixing room, writing room, vocal production space, podcast studio, and full tracking studio all have different needs.
How to fix it
Design the room around the way you work. Think about what needs to be within reach, where clients or collaborators will sit, how cables will be managed, and how the room will support recording, editing, mixing, or playback.
Good studio design should make the technical side feel seamless, so the creative work can stay in focus.
8. Skipping Measurement and Calibration
Even a well-designed room benefits from measurement and calibration. Relying only on instinct can leave hidden problems unresolved.
Your ears are important, but they adapt quickly. If you work in a flawed room long enough, the room starts to feel normal, even when - in reality - it is already misleading you.
How to fix it
Measure the room after speakers and treatment are installed. Acoustic measurement can reveal frequency peaks, nulls, decay issues, and speaker balance problems that may not be obvious at first.
From there, adjustments can be made to speaker placement, listening position, treatment coverage, and calibration. This final stage helps the room perform more accurately and consistently.
Calibration does not replace good design, but it helps refine the system.
What Good Recording Studio Design Should Do
The goal of any recording studio design is not simply to make a room quieter or more stylish. It is to create a space where sound is accurate, controlled, and trustworthy as possible.
A well-designed studio should be able to help you:
Hear detail clearly
Make confident mix decisions
Record cleaner, more controlled audio
Reduce guesswork and revisions
Improve translation across different playback systems
Work faster and with more confidence
When the room is designed correctly, your speakers, gear, and creative decisions all become more precise and reliable.
Final Thoughts
Many recording problems begin with the room. Poor geometry, untreated reflections, bad speaker placement, weak bass control, and lack of isolation - all of these can make it harder to trust the sound you hear.
The good news is that most studio design problems can be improved with the right planning and design. By treating the room as part of the audio system, not just the place where the gear sits, you can build a studio that supports better recordings, better mixes, and even better creative decisions.
If your mixes do not translate, your recordings feel inconsistent, or your room makes every session harder than it should be, the issue may not be your equipment. It may be time to revisit your studio design.


Comments