
How Music Studio Designers Shape Professional Recording Spaces
- Jul 31
- 10 min read

A professional music studio does not begin with a list of equipment.
It begins with questions.
Who will use the room? What kind of work will happen there? Will the space be used for writing, recording, mixing, post-production, or all of the above? How many people need to work at once? What needs to be heard accurately? What needs to be isolated? How should artists, engineers, instruments, and equipment move through the space?
Music studio designers turn those creative and practical requirements into a studio that works.
Their role goes beyond choosing acoustic panels or deciding where the desk should sit. They bring together room layout, acoustics, isolation, equipment placement, technical infrastructure, workflow, and visual design so the space can support better recording and faster decision-making.
What Do Music Studio Designers Do?
Music studio designers plan how a recording or production space should look, sound, and function.
Depending on the project, their work may include:
Evaluating the existing room or building
Planning the studio layout
Positioning control rooms and tracking spaces
Designing acoustic treatment
Advising on sound isolation
Planning speaker and listening positions
Coordinating electrical and signal routes
Designing equipment and furniture layouts
Supporting lighting and visual direction
Planning installation and calibration
Coordinating with architects, contractors, and technical teams
The exact scope depends on the size and purpose of the studio.
A compact producer room may need one carefully optimized space. A commercial recording facility may require a control room, tracking room, isolation booths, technical areas, storage, and client spaces.
In both cases, the designer’s job is to make the available space perform as reliably and efficiently as possible.
Music Studio Design Starts With the Client’s Work
Every studio should be designed around the work that happens inside it.
A songwriter who records vocals and works mainly with software instruments has different needs from an engineer tracking live bands. A composer may need space for keyboards and screens. A post-production team may require precise monitoring, client seating, and video integration.
Before drawing a layout, music studio designers need to understand:
The client’s primary type of work
The equipment they use
The number of performers or collaborators involved
The required level of sound isolation
The need for recording, mixing, or both
The client’s preferred workflow
The available budget and timeline
The potential for future expansion
These requirements become the foundation of the design.
Without this step, a room may look professional but still feel awkward, sound unreliable, or fail to support the way the client actually works.
Turning Creative Goals Into a Spatial Plan
Clients often describe what they want in creative terms.
They may say they want a studio that feels open, inspiring, intimate, flexible, clean, or easy to work in. The designer must translate those ideas into physical decisions.
That may involve determining:
How much space each function needs
Where the listening position should be
Which wall the speakers should face
Whether recording and mixing should happen in one room
Where clients or collaborators should sit
How instruments and equipment should be stored
How people should move through the studio
Where acoustic treatment can be integrated
Which areas should be isolated from one another
This is where spatial planning becomes critical.
Every wall, doorway, window, workstation, and storage area affects the way the studio functions.
Choosing the Right Room Orientation
One of the first major layout decisions is how the room should be oriented.
In many rectangular studios, the speakers are positioned to fire down the longer dimension of the room. This can provide more distance behind the listening position and make low-frequency behavior easier to manage.
The listening position should also be arranged symmetrically between the side walls whenever possible.
If one speaker is near a solid wall while the other is beside a doorway or open area, the two sides may behave differently. That can affect stereo balance and make monitoring decisions less reliable.
Music studio designers consider these issues before furniture and equipment lock the room into a poor layout.
Designing the Control Room
The control room is where critical listening decisions happen.
Its layout should help the engineer hear balance, tone, depth, stereo placement, and low-frequency information accurately.
Speaker placement
The speakers and listening position are usually arranged in a balanced triangle. The tweeters should be near ear height, and both speakers should have similar relationships to nearby boundaries.
Speaker position should be evaluated in relation to:
The front wall
Side walls
Corners
The desk
Displays and equipment
Acoustic treatment
The primary listening position
Even a small change in placement can affect bass response and stereo imaging.
Listening position
The engineer should not be placed simply where the desk looks best.
The listening position needs to be selected according to the room’s dimensions and acoustic behavior. Sitting too close to a rear wall or exactly in the center of the room can create misleading low-frequency response.
Desk and furniture
A large reflective desk can interfere with the direct sound from the speakers.
Music studio designers consider desk height, depth, shape, equipment placement, and surface materials. The goal is to support the workflow without creating unnecessary acoustic reflections.
Client seating
Additional seating should allow artists, producers, or clients to participate without disrupting the main listening area.
The engineer’s position remains the reference point, but the room should still support communication and collaborative listening.
Designing the Tracking Room
The tracking room serves a different purpose.
While the control room prioritizes reliable monitoring, the tracking space must help microphones capture useful, controlled sound.
Its design depends heavily on what will be recorded.
A room used for drums and live ensembles needs different dimensions and acoustic behavior from a vocal or voiceover room. Some tracking spaces benefit from natural liveliness, while others need stronger reflection control.
Music studio designers may plan:
More reflective recording zones
Drier recording positions
Movable acoustic panels
Gobos for separation
Dedicated amplifier positions
Vocal areas
Instrument storage
Microphone and cable access
Sightlines to the control room
The room should provide enough flexibility to support different sources without creating long setup times.
Planning Isolation Booths
Isolation booths can help separate performers, amplifiers, vocals, or other sound sources during recording.
However, small booths are acoustically difficult.
If a booth is too small or treated only with thin absorption, it can sound boxy, dull, or unnatural. Low-mid frequencies may remain uncontrolled even when the upper frequencies feel overly dead.
A music studio designer considers:
Booth dimensions
Door and window locations
Wall and ceiling treatment
Ventilation
Lighting
Microphone position
Communication and sightlines
Cable connections
The type of source being recorded
The goal is not simply to make the booth quiet. It must also produce a useful recording sound.
Acoustic Design Is More Than Adding Panels
One of the most important responsibilities of music studio designers is determining how sound should behave inside each room.
That process may include controlling:
Early reflections
Flutter echo
Bass buildup
Long decay times
Uneven frequency response
Speaker-boundary interaction
Rear-wall reflections
Ceiling reflections
Differences between the left and right sides
Acoustic treatment may involve broadband absorbers, bass traps, ceiling clouds, diffusers, movable panels, and custom architectural elements.
The treatment should be selected according to the room and its purpose.
A mixing room, vocal booth, and live room should not all receive the same treatment plan. Professional studio design uses different acoustic strategies for different zones.
Sound Isolation and Acoustic Treatment Are Different
Music studio designers must also distinguish between acoustic treatment and sound isolation.
Acoustic treatment controls the sound inside a room.
Sound isolation reduces the amount of sound that travels between rooms or enters from outside.
A room can be acoustically treated and still leak sound. It can also be heavily isolated and still sound poor inside.
Isolation may require:
Additional wall mass
Decoupled construction
Sealed air gaps
Acoustic doors
Specialized studio windows
Isolated ceilings or floors
Quiet ventilation
Properly sealed electrical and cable penetrations
These decisions are most effective when they are made before construction begins.
Trying to correct major isolation problems after a studio is finished is often more difficult and expensive.
Designing Efficient Workflow Paths
Good studio design supports the movement of people, equipment, and information.
A session should not be slowed down by awkward doorways, inaccessible equipment, poor storage, or long cable runs.
Music studio designers plan several types of workflow.
Artist workflow
Artists should be able to enter, prepare, perform, and take breaks without repeatedly moving through technical areas.
There should be suitable places for instruments, cases, personal items, and preparation.
Engineer workflow
Engineers need quick access to the control room, tracking room, patching, microphones, cables, and technical equipment.
The layout should minimize unnecessary movement during recording.
Equipment workflow
Large instruments, amplifiers, racks, and cases need suitable door widths and clear paths.
A studio that cannot easily accommodate the equipment it was built to record will create problems during every session.
Signal workflow
Audio, video, data, communication, and power connections should be planned before installation.
Patchbays, floor boxes, wall panels, conduit, and equipment racks should connect logically so the studio remains organized and serviceable.
Technical Infrastructure Behind the Studio
Much of a well-designed studio is hidden behind walls, beneath floors, or inside equipment racks.
Music studio designers may coordinate:
Electrical circuits
Power distribution
Grounding strategy
Signal cabling
Network connections
Video routing
Talkback and communication
Wall and floor boxes
Patchbay layout
Equipment ventilation
Cable access for maintenance
These systems need to support the present equipment while allowing for future changes.
Poor infrastructure planning can lead to noise, clutter, difficult repairs, and expensive modifications later.
Quiet HVAC and Ventilation
Studios need fresh air and temperature control, but standard HVAC systems can create noise.
Fans, ducts, airflow, vibration, and mechanical equipment may all be audible in quiet recordings.
Music studio designers work with mechanical specialists to reduce these issues through:
Low-velocity airflow
Larger ductwork
Acoustic duct lining
Silencers or attenuators
Vibration isolation
Remote mechanical equipment
Separate temperature zones
Carefully placed vents
Ventilation should keep the studio comfortable without raising the noise floor.
Integrating Visual Design With Acoustic Performance
A professional studio should sound reliable, but it should also feel inspiring.
Materials, lighting, furniture, colors, and finishes influence how artists experience the room. They can create focus, comfort, energy, or calm.
However, visual decisions also affect sound.
Large glass surfaces, bare concrete, oversized desks, and untreated hard finishes can create reflections. Treatment added without visual planning may make a room feel cluttered or unfinished.
Music studio designers bring these considerations together.
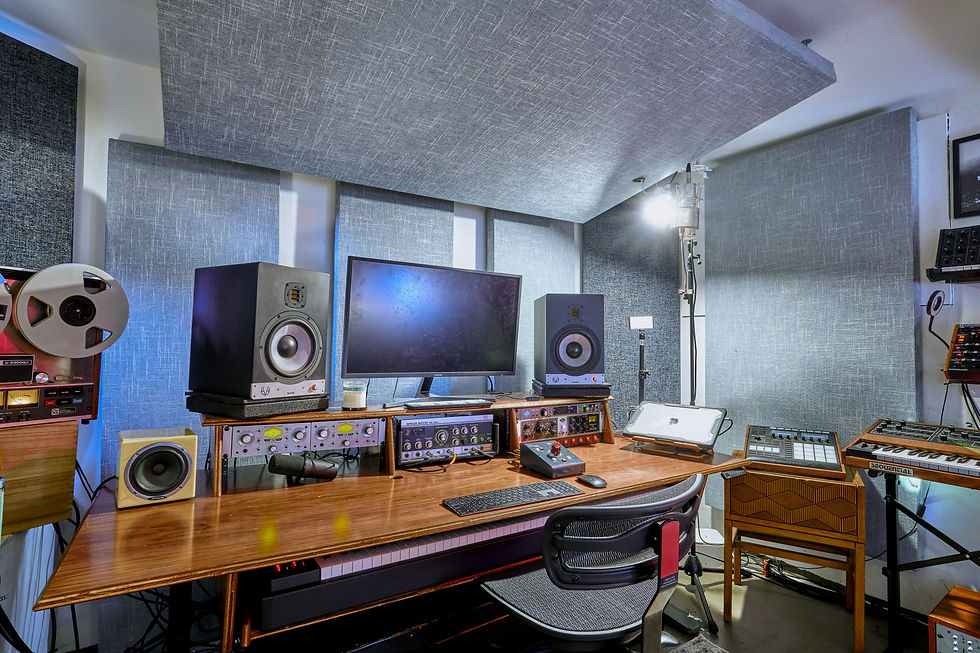
Acoustic panels can become part of the visual language. Lighting can be integrated into treatment or architectural features. Furniture can be designed around the listening position. Technical elements can be concealed without becoming inaccessible.
The result should feel like one coherent space rather than a room decorated after the acoustics are complete.
Managing the Project From Concept to Completion
The work of music studio designers often continues beyond the initial drawings.
A complete design process may involve several stages.
1. Consultation
The designer learns about the client’s work, equipment, space, goals, budget, and expectations.
2. Site evaluation
The existing room or building is assessed for dimensions, noise, construction, access, utilities, and acoustic challenges.
3. Concept development
The designer creates an initial layout and determines how the different studio functions will fit together.
4. Technical design
Acoustic treatment, isolation, electrical, signal flow, lighting, HVAC, furniture, and equipment placement are developed in greater detail.
5. Coordination
The designer may work with contractors, architects, electricians, HVAC specialists, fabricators, and equipment installers.
6. Construction and installation
Walls, doors, windows, infrastructure, acoustic treatment, furniture, and equipment are installed according to the design.
7. Measurement and calibration
The completed room is measured, speakers are positioned and calibrated, and treatment may be adjusted.
8. Final handover
The client receives a functioning studio that is ready to support the intended workflow.
Why Early Involvement Matters
Music studio designers are most effective when they are involved before construction begins.
Early planning makes it possible to influence:
Room proportions
Wall locations
Door and window placement
Isolation assemblies
Electrical circuits
HVAC routes
Cable pathways
Speaker positions
Acoustic treatment integration
Equipment access
When these decisions are made too late, the design may need to work around structural or technical problems that could have been avoided.
Early involvement can reduce rework and help the client invest in the right parts of the project from the start.
Common Problems Music Studio Designers Help Prevent
Poor room orientation
Placing the studio along the wrong axis can create monitoring and layout problems.
Asymmetrical monitoring
Unequal side walls, openings, or speaker distances can weaken stereo accuracy.
Insufficient isolation
Noise entering or leaving the studio can disrupt recordings and surrounding spaces.
Inadequate bass control
Thin treatment alone cannot resolve major low-frequency problems.
No space for equipment or storage
Cases, stands, cables, and instruments can quickly block work areas.
Poor signal planning
Unplanned cable routes create clutter, noise, and difficult maintenance.
Loud ventilation
A studio may be acoustically controlled but still unusable for quiet recording if the HVAC system is noisy.
Workflow bottlenecks
Awkward movement between rooms can slow down every session.
Visual design added too late
Separating acoustics from aesthetics often results in compromises on both sides.
When Should You Work With a Music Studio Designer?
Professional guidance can be especially valuable when:
You are building a new studio
You are converting a residential or commercial room
You need both recording and mixing spaces
You require sound isolation
You are planning electrical, signal, or HVAC work
You are investing significantly in equipment
Your current room produces unreliable results
You want the space to support clients or collaborators
You need a studio that can adapt over time
A smaller room can also benefit from professional design. Limited space often makes planning more important because every decision has a greater acoustic and practical impact.
What Makes a Successful Music Studio Design?
A successful studio is not defined only by how it looks or by the equipment it contains.
It should help the people inside it work better.
A strong design provides:
Reliable monitoring
Controlled recording conditions
Low background noise
Clear communication
Efficient equipment access
Logical cable and signal routes
Comfortable working conditions
A visual environment that supports creativity
Flexibility for changing projects
Confidence in the sound leaving the room
When all of these elements work together, the room becomes part of the creative process instead of an obstacle to it.
Frequently Asked Questions About Music Studio Designers
What is the difference between a music studio designer and an interior designer?
An interior designer primarily focuses on the appearance, comfort, and use of a space. A music studio designer also addresses acoustics, sound isolation, speaker placement, recording requirements, technical infrastructure, and audio workflow.
Do music studio designers only work on large commercial studios?
No. Music studio designers can work on home studios, production rooms, writing spaces, mix rooms, podcast studios, post-production facilities, and commercial recording studios.
Can a music studio designer improve an existing room?
Yes. An existing studio can often be improved through layout changes, speaker placement, acoustic treatment, wiring, furniture adjustments, and calibration. Structural isolation problems may require more extensive work.
When should a music studio designer join the project?
Ideally, the designer should be involved before construction, renovation, or major equipment purchases. Early involvement provides more control over room proportions, infrastructure, isolation, and layout.
Are acoustic panels enough to create a professional studio?
No. Panels are one part of the system. A professional studio also depends on room geometry, speaker and listener placement, isolation, bass management, workflow, infrastructure, and calibration.
Final Thoughts
Music studio designers shape recording spaces by connecting creative goals with technical decisions.
They determine how rooms should be arranged, how sound should behave, how equipment should connect, and how people should move through the production process. They help prevent acoustic, structural, and workflow problems before those issues become costly or difficult to correct.
The result is more than a finished room.
It is a working studio system—one that helps artists perform comfortably, allows engineers to hear accurately, and supports faster, more confident production from the first idea to the final playback.


Comments